Voicemail
*97
Dial *97 to quickly access your voicemail and listen to your messages.
Help and troubleshooting
Quickly resolve the most common issues with your VoIP line using simple, clear, proven steps.
Here are the quick codes to dial directly on your phone.
Voicemail
*97
Dial *97 to quickly access your voicemail and listen to your messages.
Enable call forwarding
*72
Dial *72, then enter the destination number to forward to.
Disable call forwarding
*73
Dial *73 to turn off call forwarding.
Start with these quick checks. They resolve most common issues.
Make sure your router is online and no Internet outage has been reported in your area.
Test my connectionPower off your router and your VoIP phone/adapter for 30 seconds, then turn them back on starting with the router.
If the problem persists, we check your line and guide you step by step.
Reach usIf you use your own equipment, here are the settings required to configure it.
Only the following protocols should be active:
{ <:8339471145>611 | 911 | 1[2-9]xx[2-9]xxxxxx | [2-9]xx[2-9]xxxxxx | *xx }If asked by technical support over the phone or by email, follow the instructions below to perform a factory reset of your Grandstream HT-801 or HT-801v2 VoIP adapter.
Step 1 — With the adapter powered on, unplug the blue Ethernet cable from the Internet port.
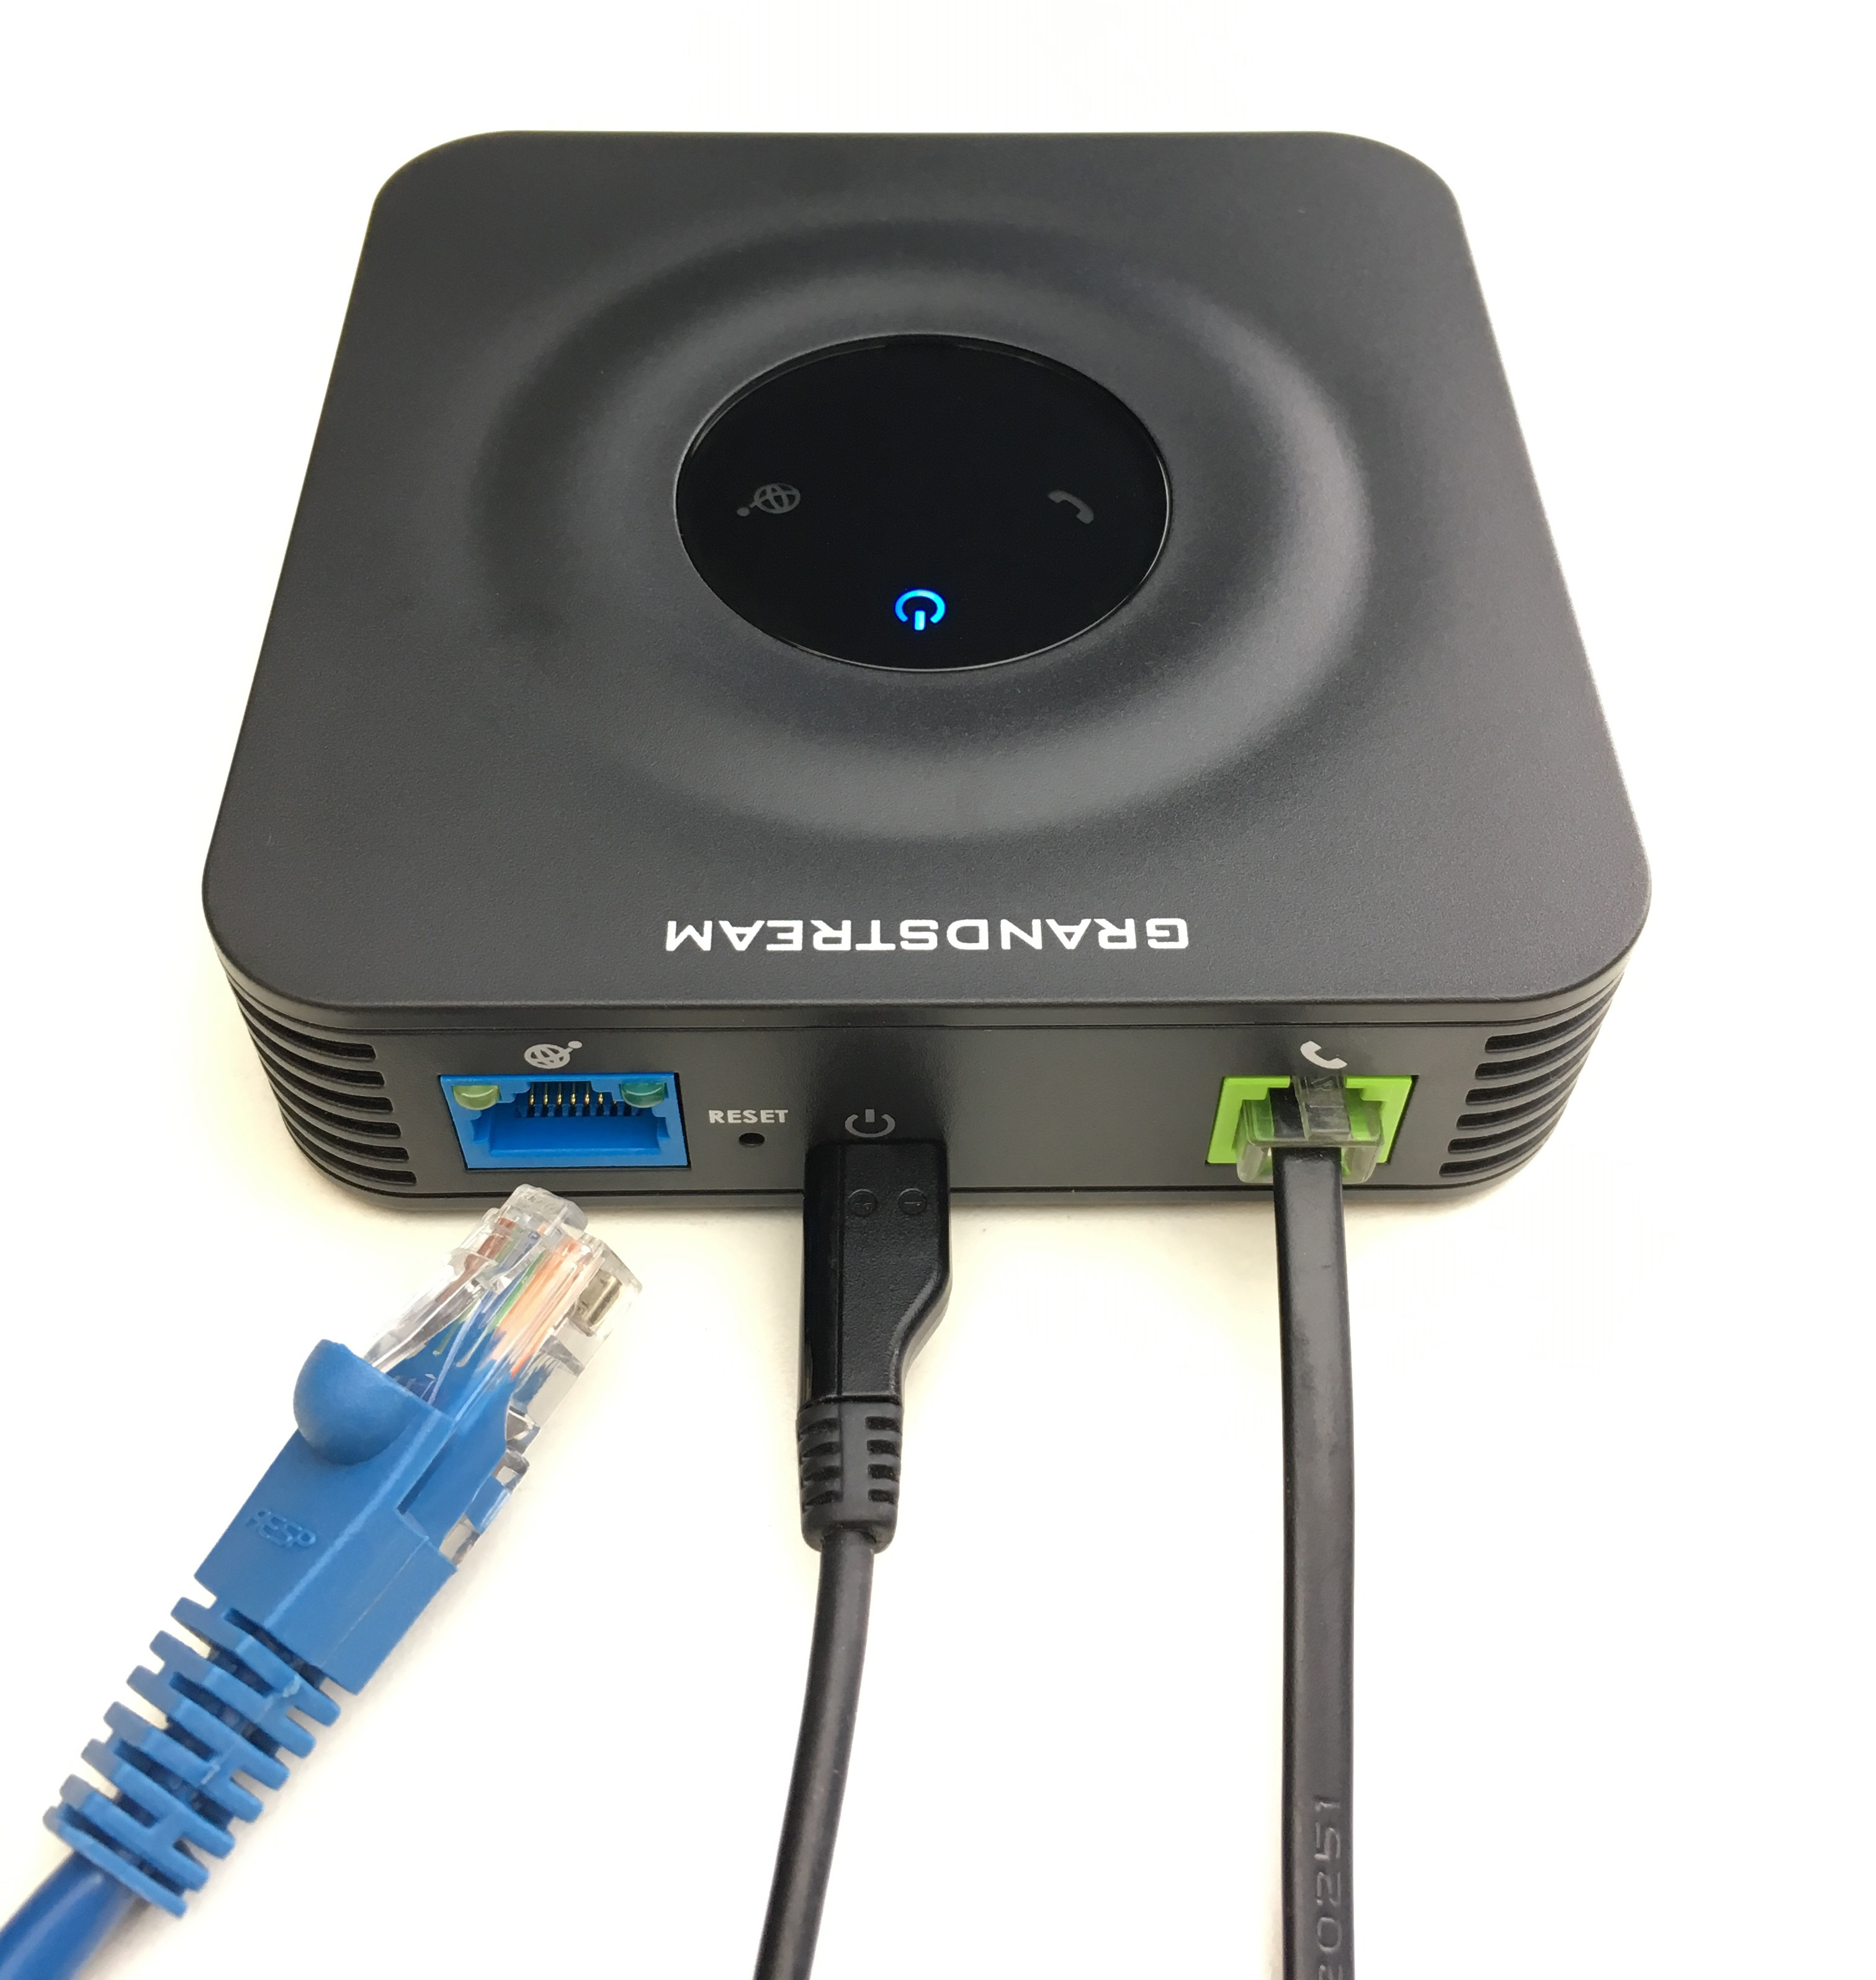
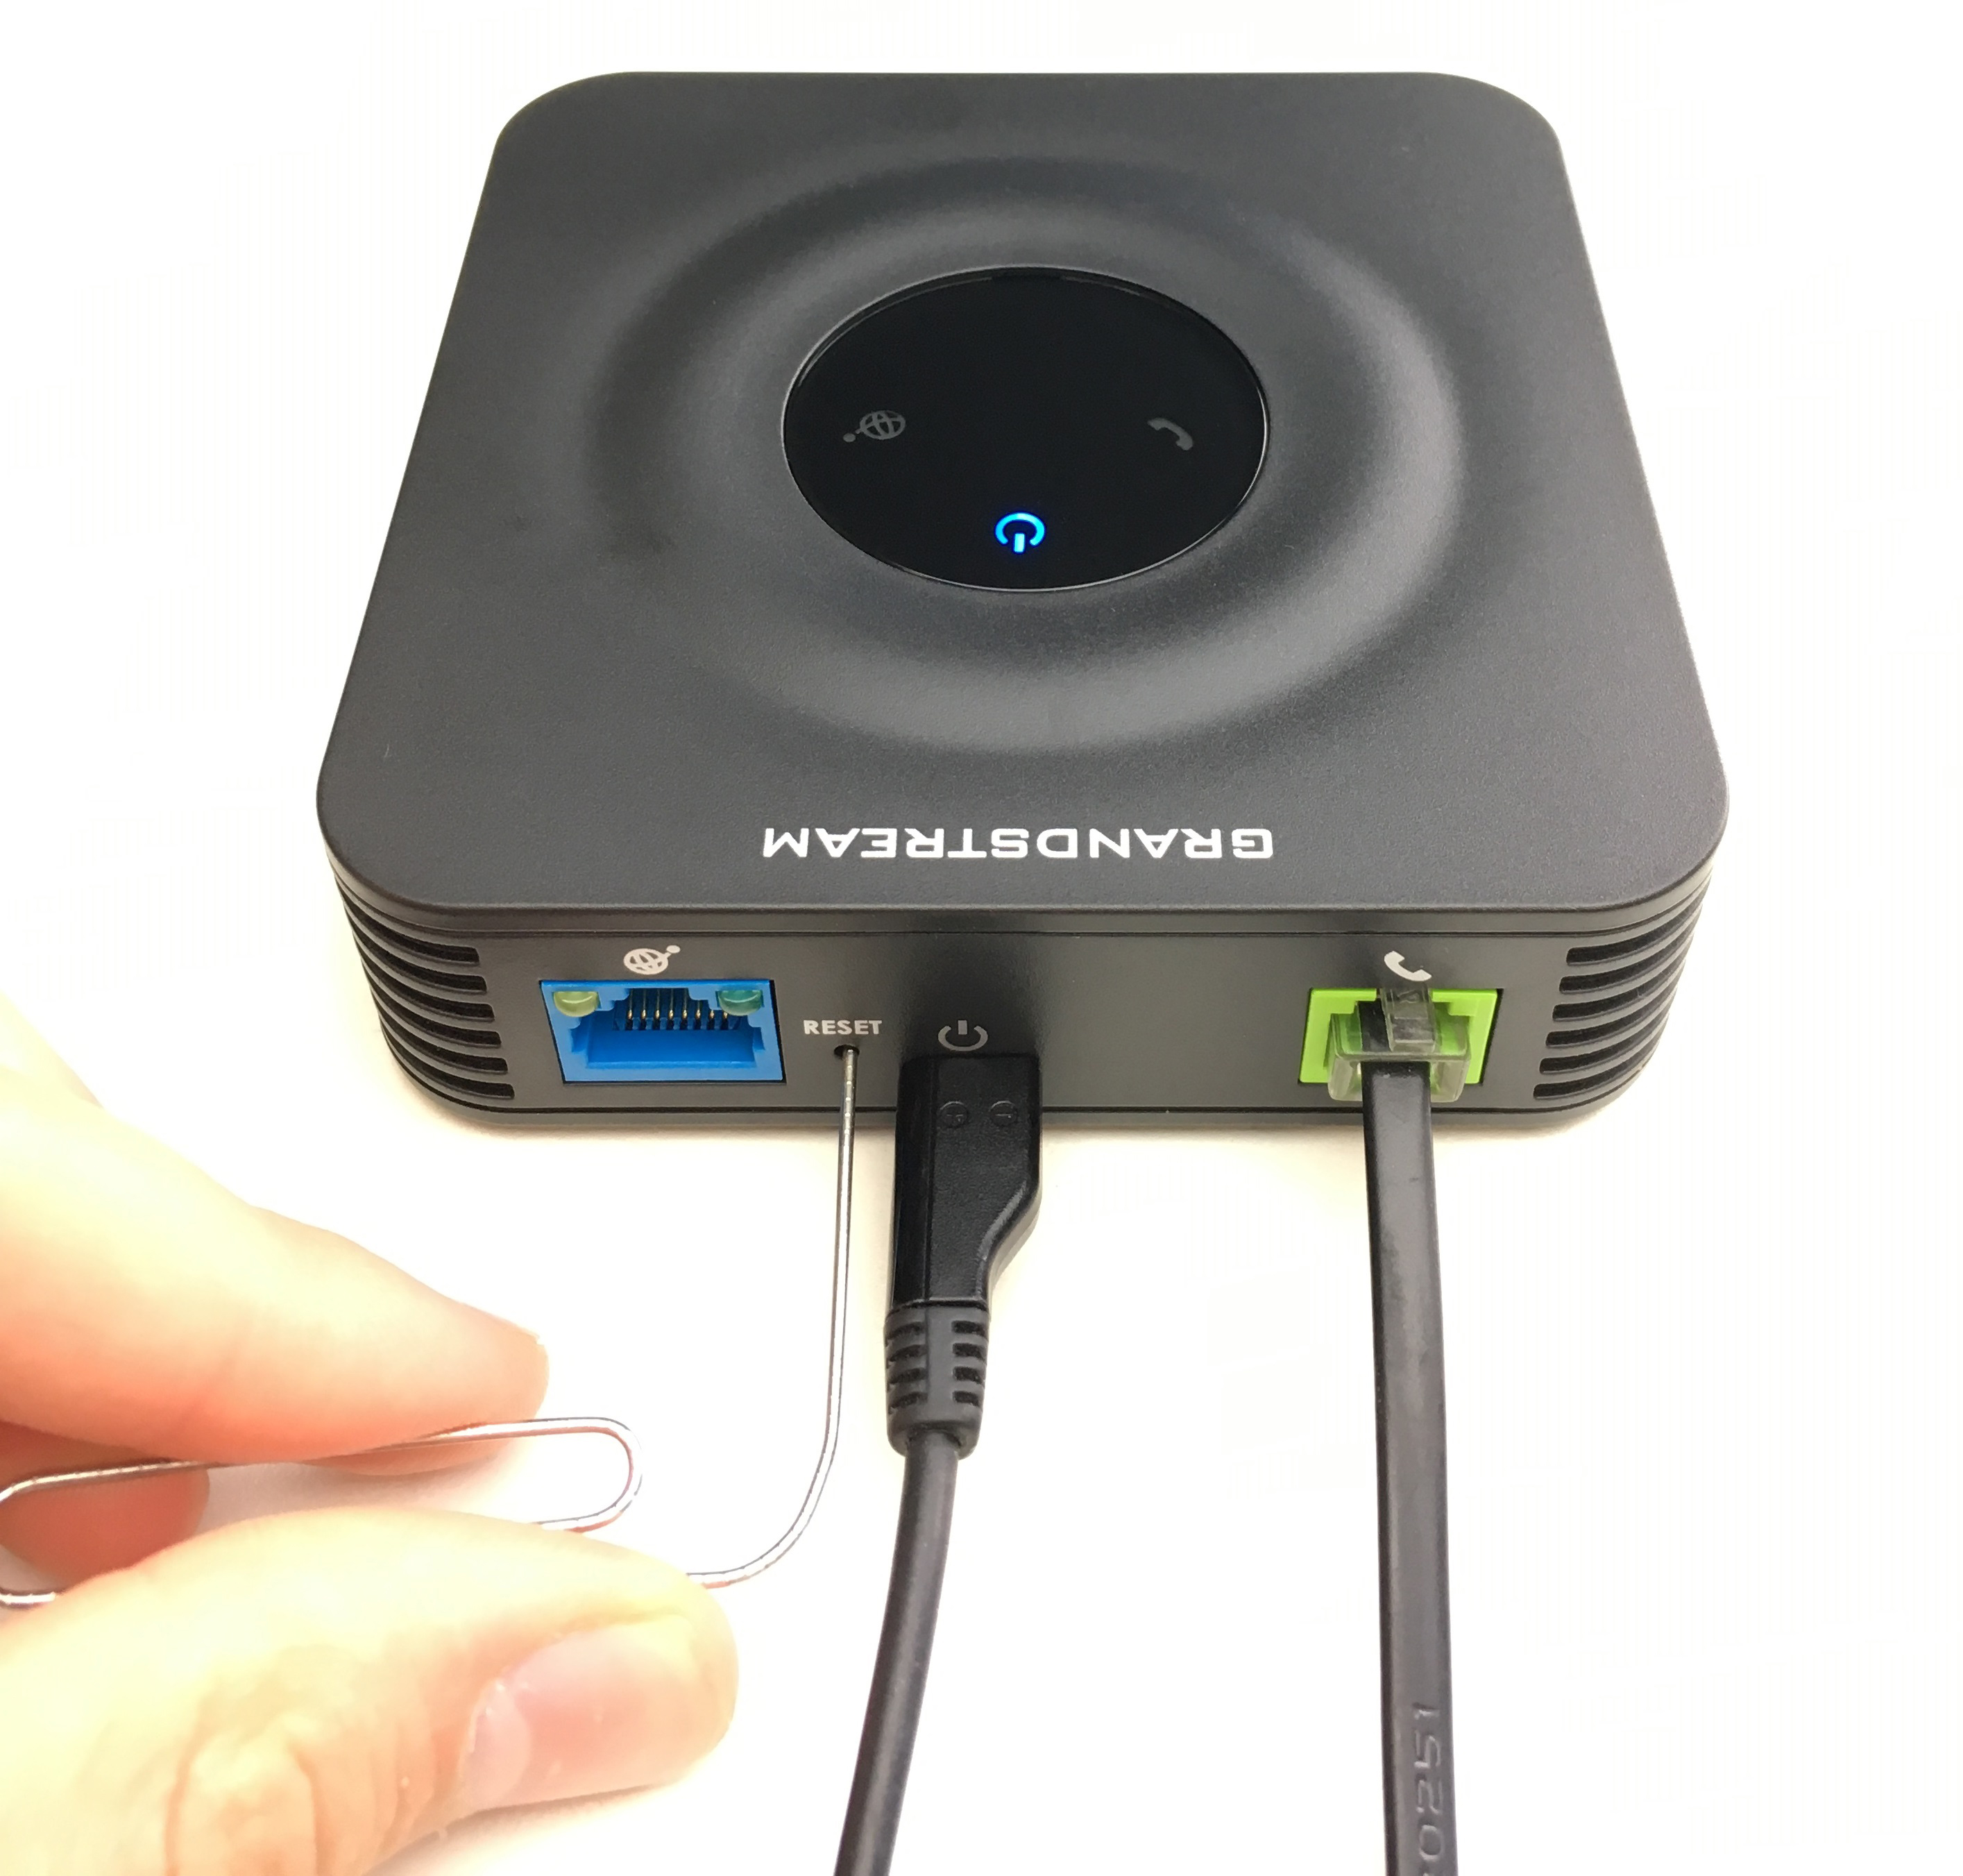
Step 2 — Locate the small pin-sized hole labelled Reset on the back of the adapter.
Step 3 — Insert a thin object (e.g. a paper clip), then press and hold the Reset button for about 7 seconds (you should hear a click at the start). When the 3 lights blink, release the Reset button.
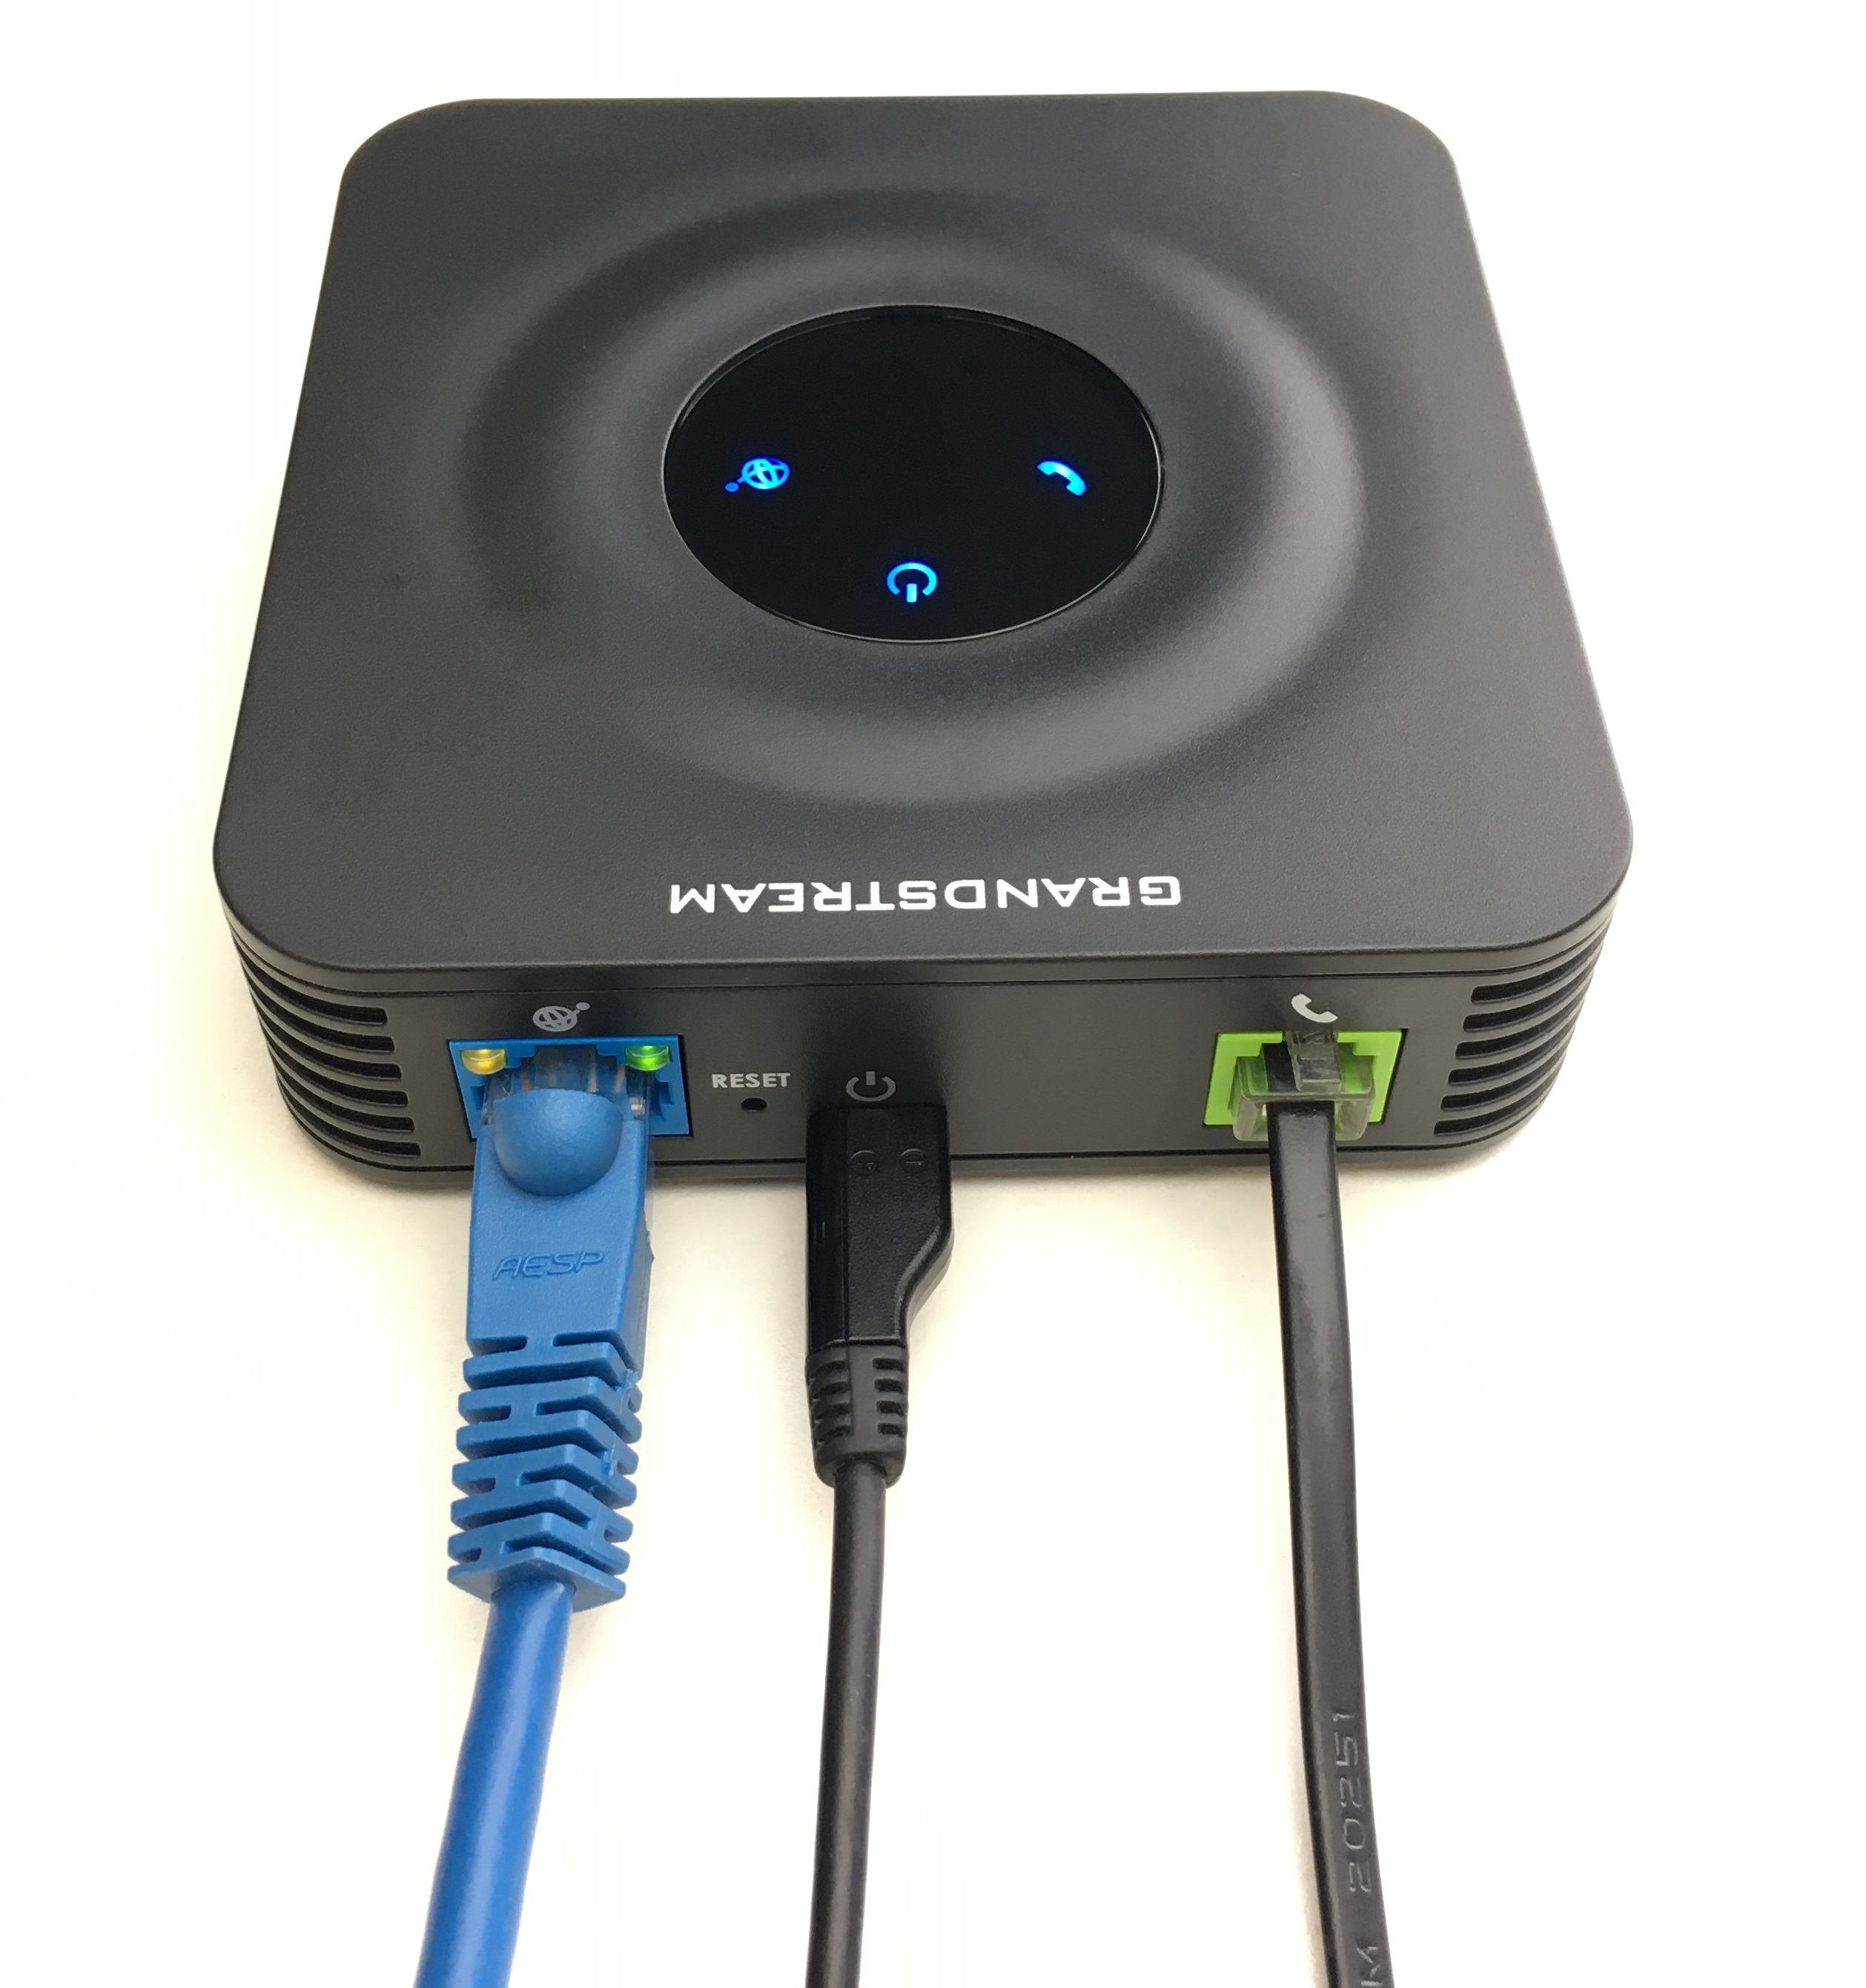
Step 4 — Plug the blue Ethernet cable back into the Internet port. The 3 lights turn on briefly, then only the power light stays on.
Step 5 — Wait a few minutes for the 3 lights to come back on. Once all 3 lights are lit, your phone is ready to use.
Our team can review your situation and offer the fastest solution.